12 Rustic Diy Landscaping Ideas with Rocks That Wow
Want a yard that looks curated but still effortless? Rocks bring that rugged, cozy, cabin-in-the-woods energy—without the maintenance nightmare. These DIY ideas pack a punch, stretch your budget, and make your neighbors wonder when you hired a professional. Grab your gloves, cue the playlist, and let’s rock your landscape—literally.
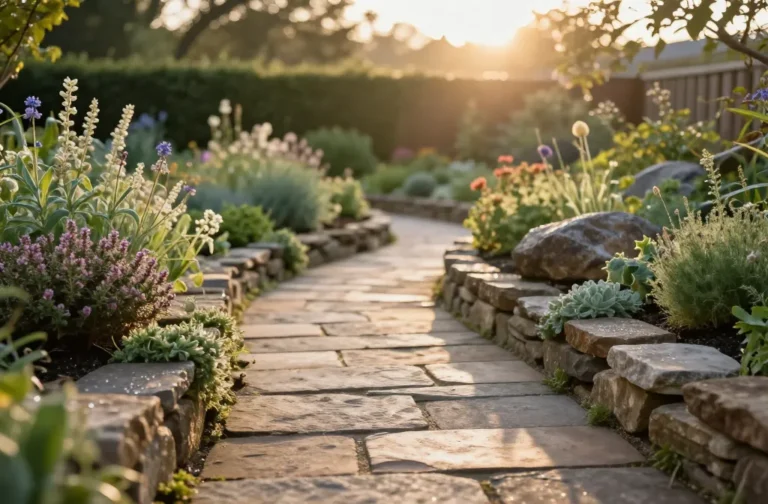
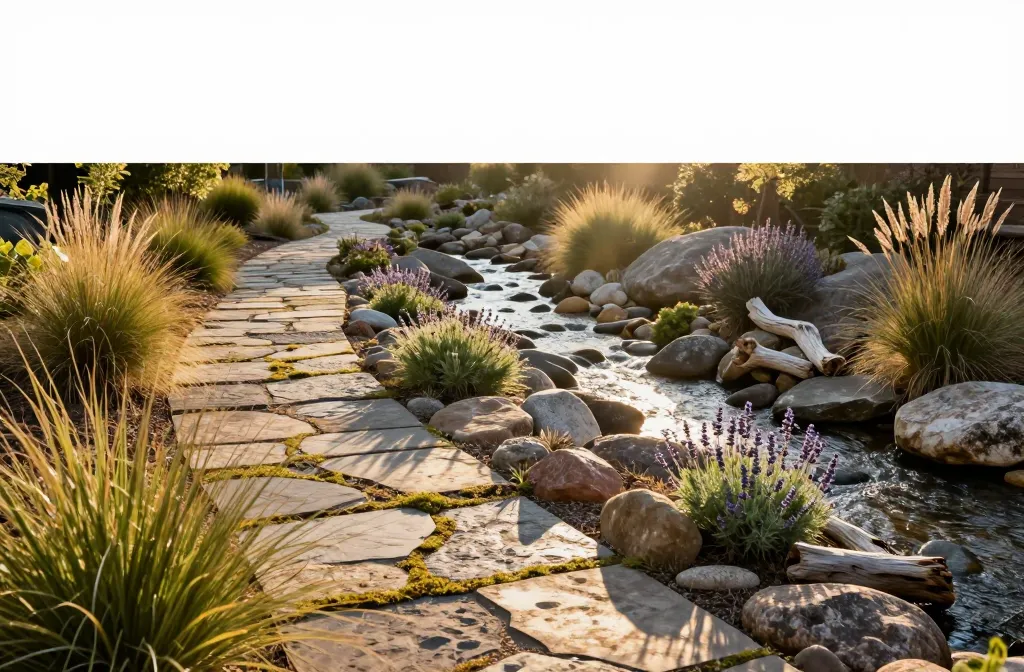
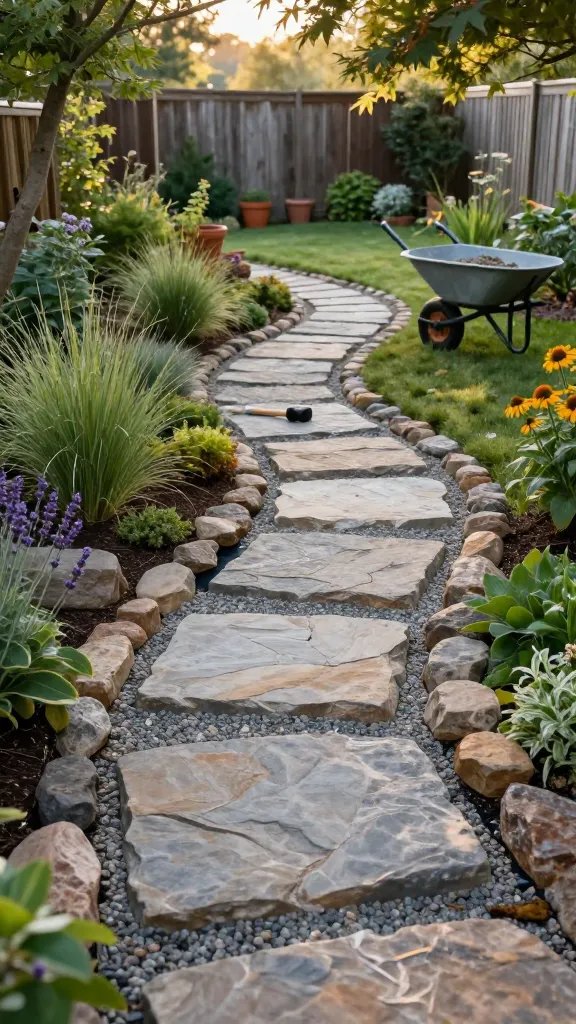
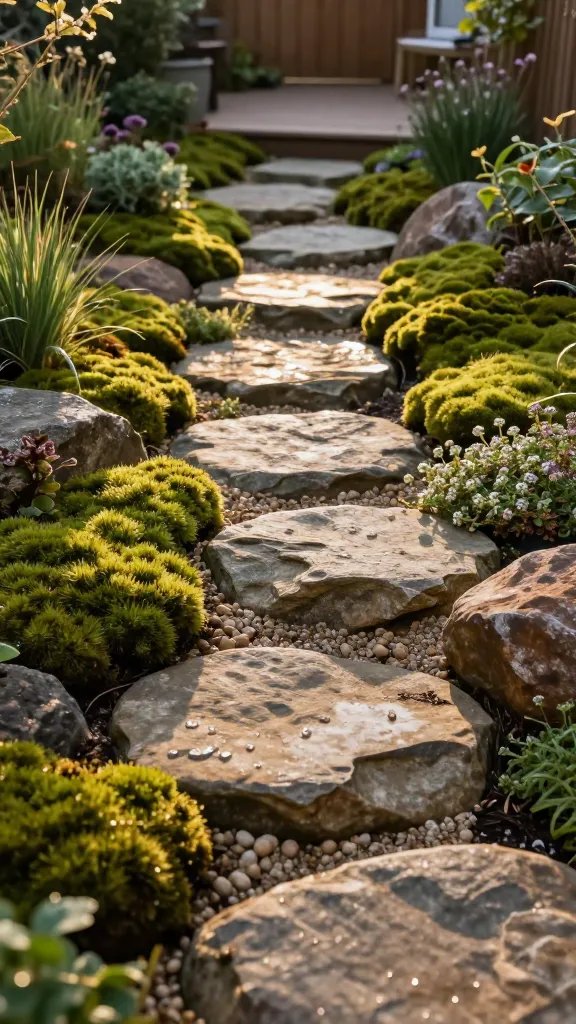
1. Create a Meandering Rock Pathway
Tired of snacking when you’re not even hungry? This reset helps you stop the loop and feel back in control.
A simple reset for moments when cravings take over. Easy to use, easy to repeat, and designed to help you feel satisfied instead of stuck.
Nothing says “welcome to my outdoor sanctuary” like a winding path through the garden. A rock pathway adds instant charm and guides guests where you want them. It also keeps shoes out of mud-ville after rain.
Materials
- Flat stepping stones or flagstone
- Gravel or decomposed granite
- Landscape fabric and edging
- Level and rubber mallet
Sketch an S-shaped path and clear the grass. Lay fabric to block weeds, spread a layer of gravel, and bed each stone so it sits flush—no ankle-twisting allowed. Finish with edging to keep everything tidy.
Use this when you want to connect spaces organically and add that storybook feel to your yard.
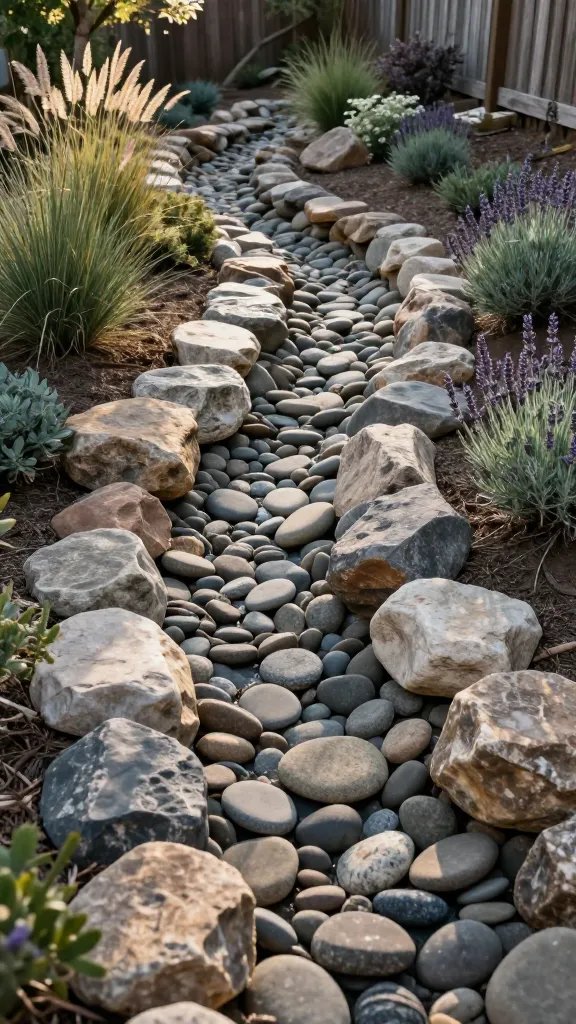
2. Build a Serene Dry Creek Bed
Transform Your Home With 7,250+ Stunning Landscaping Designs—No Expensive Designers Needed!
- 🌿 Access 7,250+ stunning landscaping designs.
- 💰 Save thousands—no pro designer needed.
- 🏡 Plans for gardens, patios, walkways, and more.
- ✨ Simple, beginner-friendly DIY layouts.
- 🛠️ Customize any design to fit your yard.
Dry creek beds look like nature carved them ages ago—and they actually help with drainage. It’s form meets function, which IMO is the dream combo.
Key Points
- Dig a shallow, curving trench (8–12 inches deep).
- Line with landscape fabric for weed control.
- Use larger river rocks for edges, smaller ones for the center.
- Add a few boulders for drama and “natural chaos.”
Plant ornamental grasses and drought-tolerant perennials along the edges to soften the look. This works beautifully in sloped areas or any spot that puddles after storms.
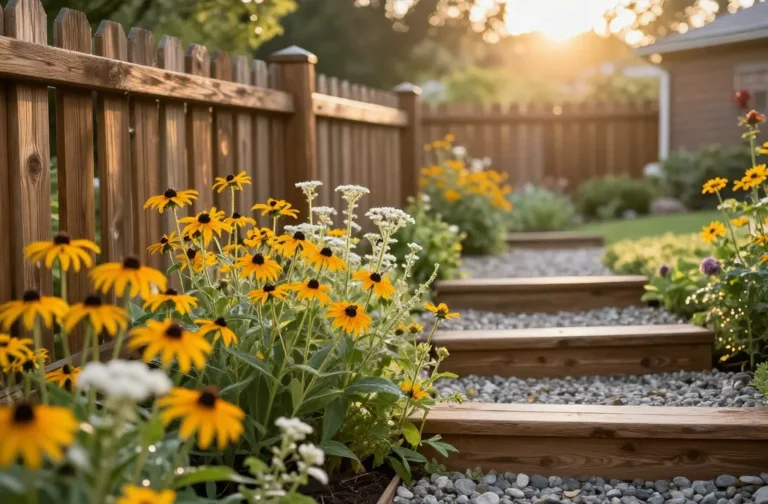
3. Edge Beds With Chunky Fieldstones
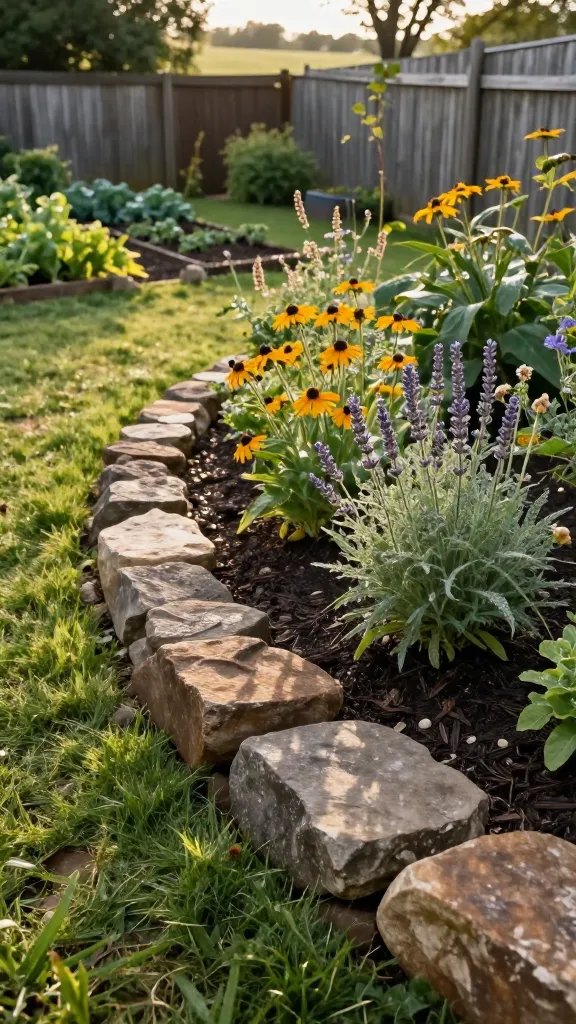
Bed edging makes everything look deliberate, even if you planted at 5 p.m. on a Sunday. Using chunky fieldstones adds rustic personality and keeps mulch from escaping.
Tips
- Dig a shallow trench so stones sit slightly below soil level.
- Stagger joints and vary sizes for a natural look.
- Backfill with soil to lock stones in place.
Pair with native plants and wildflowers for a backyard meadow vibe. Great for defining pathways, veggie beds, or play zones without harsh lines.
4. Stack a Low Rock Wall (No Mortar Needed)
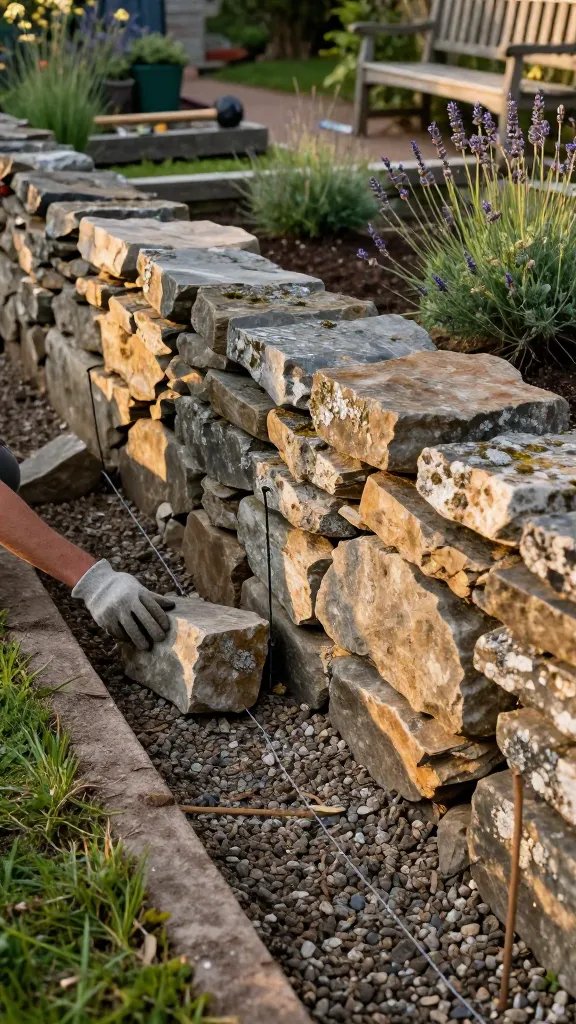
Stone walls feel ancient and cool, and you don’t need mortar if you stack them smart. Dry-stacked walls add texture, levels, and instant character.
Materials
- Flat stones or stacked stone blocks
- Gravel for base
- String line for height
Dig a stable trench, add gravel, and start with your largest stones as a base. Overlap seams like you mean it, tilt slightly inward, and cap with flatter stones. You’ll create seating, garden tiers, or borders that look like they’ve always been there.
Perfect for sloped yards or around patios where you want built-in perches.
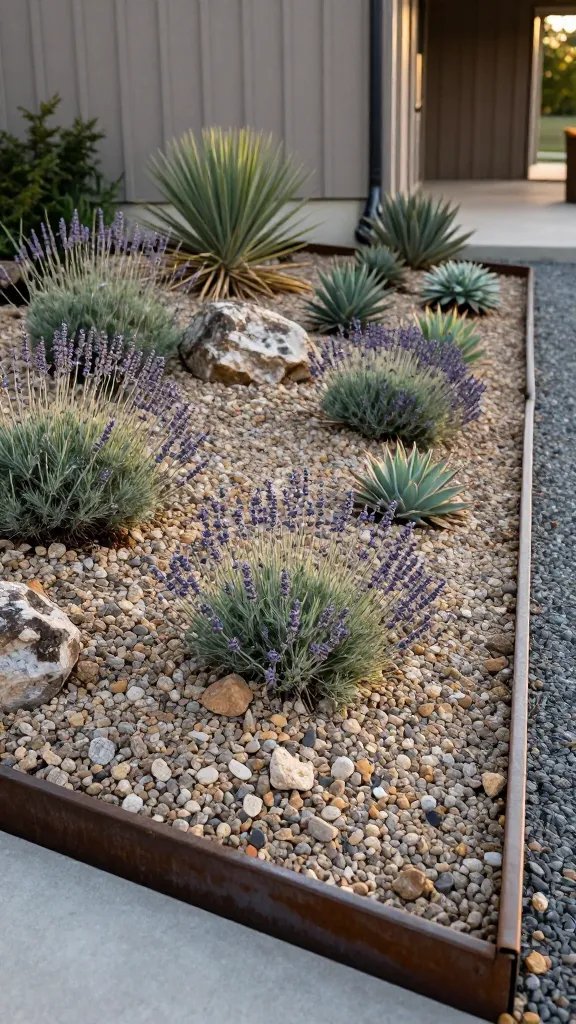
5. Design a Rock Garden With Alpine Flair
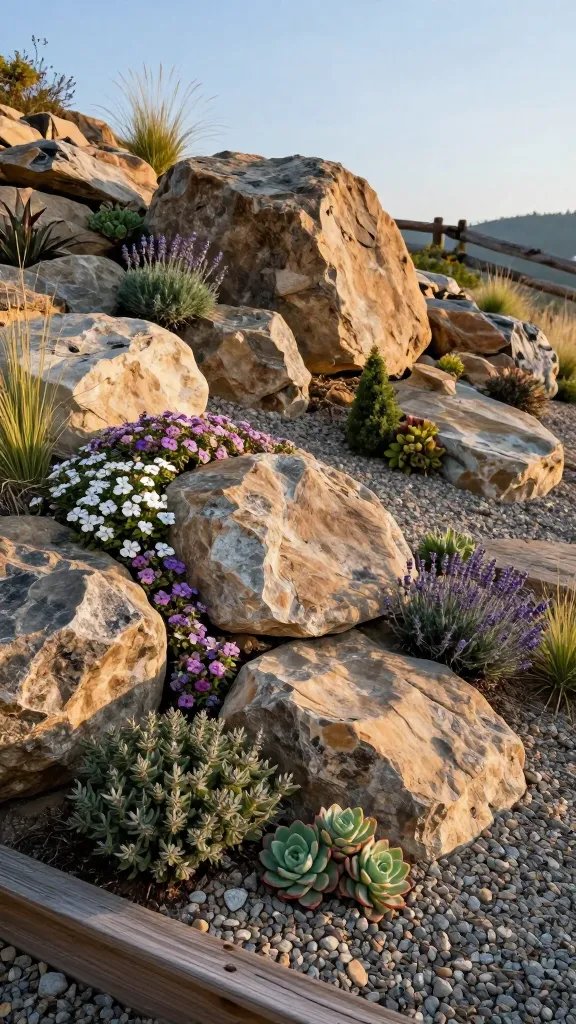
Short on water and patience? A rock garden brings drama without the drama of constant watering. Think sculptural stones, gravel mulch, and tough-as-nails plants.
Plant Ideas
- Sedum and sempervivum (hens-and-chicks)
- Thyme and creeping phlox
- Lavender and dwarf junipers
Group rocks in odd numbers and vary sizes for visual rhythm. Tuck plants into crevices so they spill and soften the stones. Use this for sunny slopes and corners that need love but not attention.

6. Lay a Crushed Stone Patio You Can Build in a Weekend
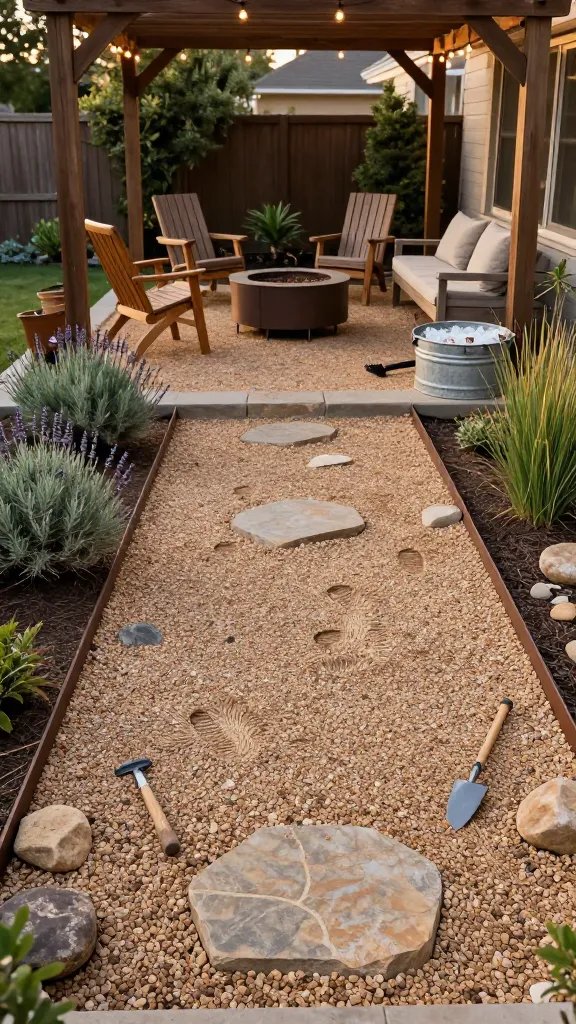
Dreaming of a chill hangout spot without pouring concrete? A crushed stone patio delivers rustic charm and serious flexibility. It’s easy to maintain and kind to your budget.
Steps
- Mark the space and dig 4–6 inches deep.
- Compact a base of crushed gravel.
- Top with decomposed granite or pea gravel.
- Add pavers or large flagstones as “islands” for stable footing.
Style it with string lights, a stock-tank cooler, and a fire pit if your code allows. Great for casual dining areas or under a pergola.
7. Frame a Fire Pit With River Rocks
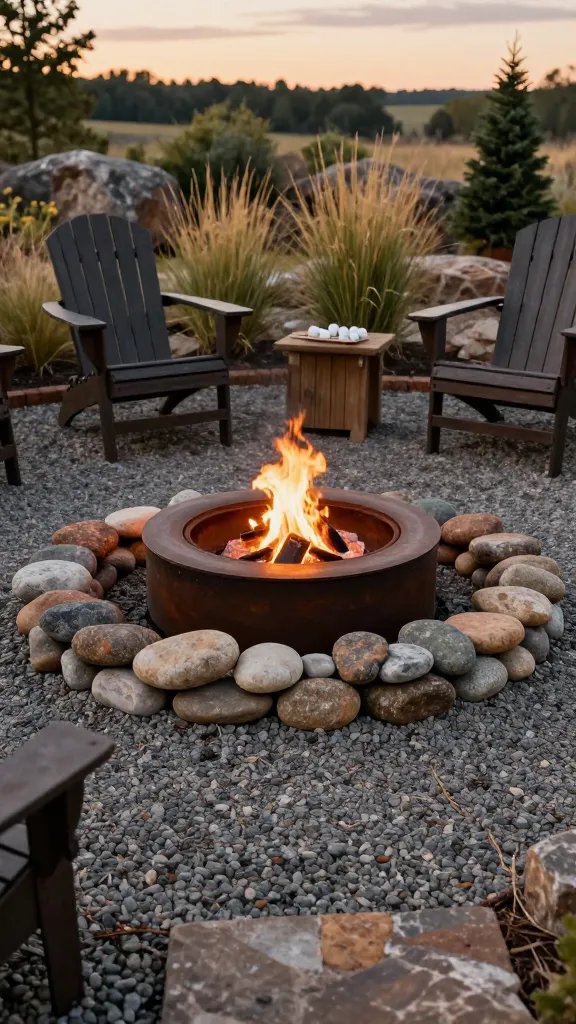
Few things beat s’mores under the stars. A rock-ringed fire pit looks natural and keeps sparks under control—seriously, safety first.
Materials
- Steel fire ring insert
- River rocks or fire-rated stones
- Gravel base
Set your ring on compacted gravel and stack stones neatly around it. Add a generous gravel “safety zone” of at least 3 feet. Use this to anchor your outdoor living area and extend your patio season by months.
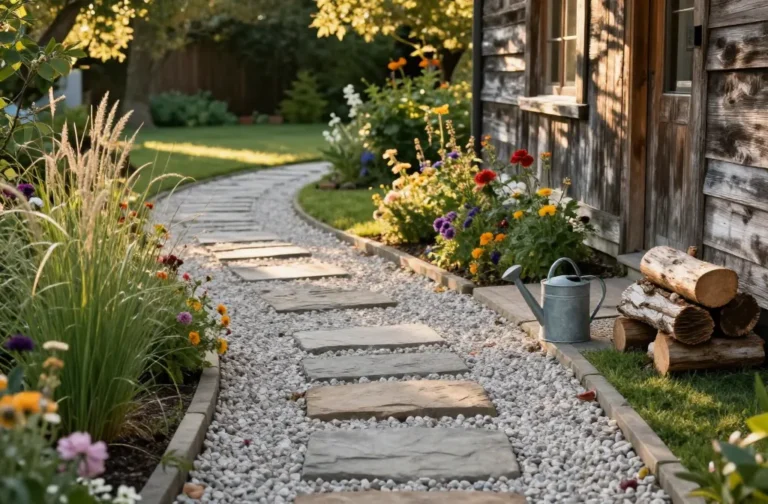
8. Tuck Moss and Groundcovers Between Steppers
Want that storybook-cottage path? Plant low growers between stepping stones and let them spill a little. It softens hard edges and invites barefoot wandering.
Best Choices
- Moss for shady, damp paths
- Irish moss or Scotch moss for bright green cushions
- Creeping thyme for sunny, fragrant gaps
Leave 2–3 inches between stones and fill with compost-sand mix before planting. This shines along entry paths and around patios where you want texture and color without fuss.
9. Make a Boulder Focal Point That Looks Intentional
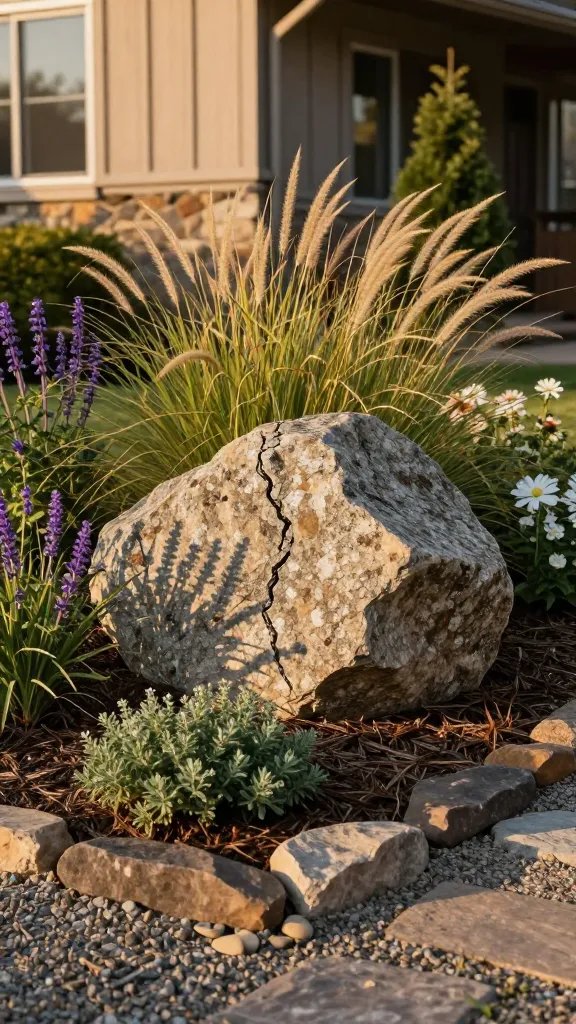
One strategically placed boulder can anchor an entire bed. It brings scale, contrast, and that “nature dropped this here” energy.
Tips
- Choose a boulder that’s about one-third the height of nearby shrubs.
- Dig so at least one-third of the stone sits below grade for realism.
- Rotate to showcase the most interesting face or vein pattern.
Surround with ornamental grasses and perennials to blend edges. Use this move to ground a front yard bed or add weight to an otherwise flat space.
10. Craft a Rustic Rock Herb Spiral

Herb spirals look whimsical and maximize tiny spaces. The spiral shape creates microclimates, so sun-lovers and shade-tolerant herbs all thrive. It’s science meets garden magic.
How-To
- Lay a 3–4 foot circle foundation with stones.
- Spiral upward, filling with soil as you go to about 2 feet high.
- Plant rosemary and thyme on top, basil and parsley mid-slope, and mint near the bottom.
Place it near your kitchen door for easy clipping. Great for small yards, patios, and anyone who loves cooking, FYI.
11. Add Rock Mulch for Low-Maintenance Beds
Mulch made of rock? Yes, and it looks crisp for years. Rock mulch blocks weeds, retains heat for Mediterranean plants, and doesn’t need replacing every spring.
Best Uses
- Along foundations to avoid termite-attracting wood mulch
- With succulents, yucca, and lavender
- In windy or sloped areas where bark blows or washes away
Lay fabric first, then spread a 2–3 inch layer of crushed stone or pea gravel. Use this when you want super low maintenance and a clean, modern-rustic aesthetic.
12. Build a Mini Rock Water Feature Without Plumbing
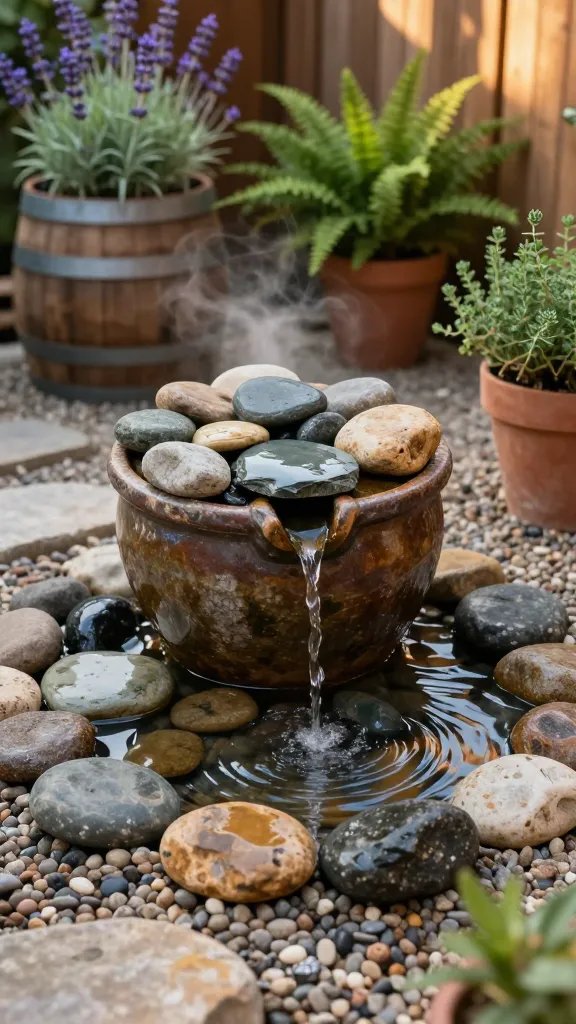
Want the soothing sound of water without a major install? A simple recirculating fountain with rocks gives you zen on demand. It’s compact, charming, and easy to hide components.
Materials
- Large ceramic pot or whiskey barrel
- Pump and tubing
- Reservoir basin or buried tub
- River rocks to cover the surface
Set the pump in a basin, run tubing up through a decorative stone or spout, and cover the top with rocks so water vanishes between them. Top off occasionally and add a timer. Perfect for patios, shady corners, or as a front-porch statement piece.
Ready to grab some gloves and play with rocks? Pick one project, then ride the momentum—your yard will start to look intentionally wild in the best way. Small tweaks stack up fast, and before you know it, you’ll have the coziest, most photogenic space on the block—trust me.